
First and foremost, it’s vital to note that, in the context of the total reaction to water damage, the dry out procedure is often carried out in the midst of the process instead of at the beginning of it.
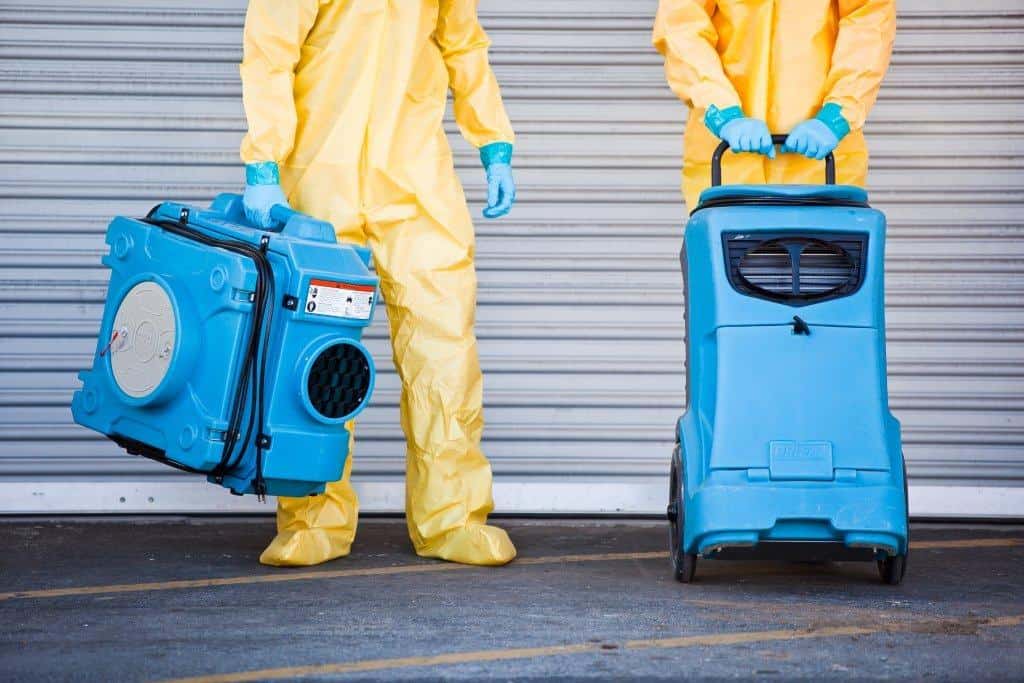
Dehumidifiers and other similar products should be used before beginning the drying process to reduce the likelihood of mold growth and to eliminate any remaining standing water.
Because this standing water may constitute a possible health threat, you and any other restoration specialists should avoid working in it until it has been completely removed.
Other possible safety hazards that should be kept an eye out for are as follows:
- Checking to see whether the business or home’s electricity is off
- Checking for gas leaks and smells
- Ensuring that the structure of the building is sound
For the most part, this procedure is only necessary for serious flooding circumstances; thus, you may avoid it if the water damage is limited to a single area or room. Preparing pictures of the house for insurance reasons is another smart thing to do until you dry it out.
When it comes to the actual drying process, it’s crucial to be thorough since there are numerous things that might possibly hold water that isn’t immediately visible.
The attic serves as an excellent illustration of this. Insulation may readily get moist, resulting in a loss of efficacy. Wet boxes or storage might cause fractures in the ceiling below if they are not properly ventilated.
Calculating Drying Time: Factors to Consider
Water Damage to Your Home’s Structure
If you have a leak or water has come into touch with your property, one of the elements to examine is the amount of water that has gotten into your home. The greater the amount of water present, the longer it will take to dry off your property.
When you are coping with a few inches of water, it is quite simple to pump it out using a hand pump. However, if there are around 4 feet of stagnant water in the whole bottom of your room, it might take anything from hours to days to completely dry out your property.
The Water’s Source
You’ve probably heard that not all water damage is created equal. With the sort of flooding you’ve had, this is the best course of action.
Flooding caused by overflowing rivers or sewage is more difficult than flooding caused by broken pipes or localized rain to clean and dry up. The latter is unclean and may include toxins, making it more difficult and time-consuming for a property to dry out.
The Destroyed Materials
The drying time depends on the water damage and the materials. Carpet and other sofa materials need more cleaning than plastic and metal. You must also consider the damaged building materials. Stone walls take longer to cure than drywall or wood floors.
Water has also harmed these materials. Drying is sufficient if the water that contacted your carpet was clean. Even if the process takes a long time, mold might develop in the materials. If you have filthy water damage, expect to put in a lot of time and work. It’s time to clean your carpet. Using any of these methods may prolong drying time.
Open the windows in your house.
You should begin by opening the windows in your house, in this or any other room, to allow natural airflow to circulate throughout the space. However, specialists will bring additional equipment to assist you with this procedure.
Large fans, known as air movers, are used to circulate the airflow across space to keep it fresh. The same dehumidifiers that were used to prevent mold from developing after the first cleaning will also be employed to achieve a similar result during the dry-out stage.
Additionally, maintaining a dry atmosphere reduces the likelihood of swollen or warped flooring and furnishings in the future.
Take the time to look at every portion of the affected area for moisture.
The thing that seems to slow down the drying process the most is taking the time to thoroughly inspect every inch of the afflicted area for signs of wetness.
Insulation has previously been stated, but it is also necessary to remove backboards, molding, and wallpaper in order to eliminate any stored moisture.
While wallpaper may come as a bit of a surprise in this situation, it is necessary because it provides a “seal” that keeps moisture trapped in the wall.
Other severe, but necessary, ways may include boring openings into the drywall to allow it to dry out more quickly, among other things.
Containment is the last step in the dry-out process, and it takes place in conjunction with the rest of the work being done. In order to guarantee that heat and suction are directed to the rooms that need it the most, wet parts in the house will be taped off while drying takes place.
To determine how effectively the drying is proceeding, the dry-out team will inspect the surfaces as well as readings taken throughout the process. When it is fully completed, you may begin rebuilding the space in order to make it usable once more.
There are many distinct components to a dry-out, and doing it correctly is critical to ensuring that your property is not irreversibly damaged in the process.
Make certain that you get professional guidance.
The most effective approach to do this is to ensure that you have expert assistance and support, which includes collaborating with Water Damage Restoration.
This means that they use the most effective cleaning and restoration techniques to aid in the recovery of your property after significant damage, such as that caused by a plumbing breakdown or extreme weather.
In addition, they make certain that they are able to charge your insurance provider for their services rather than leaving you to bear the financial burden.